
 With all the crazyiness going on in the world during the corona virus, covid-19, I love the fact that people are hiding bears around their homes for children to 'hunt' for during walks and bike rides. I designed a very simple file that can be used on a cnc, laser cutter, 3d printer, vinyl cutter or just a regular everyday home printer that you can print out on paper for kids to color. Please feel free to use these files as you'd like. Please tag me, email me, or leave a comment on the socials so I can see what you do with the, @myerswoodshop. We're in this together! Let's bring a smile to the faces of children. -Ben *This is a ZIP file. You will need to 'unzip' the file to access the files*
4 Comments
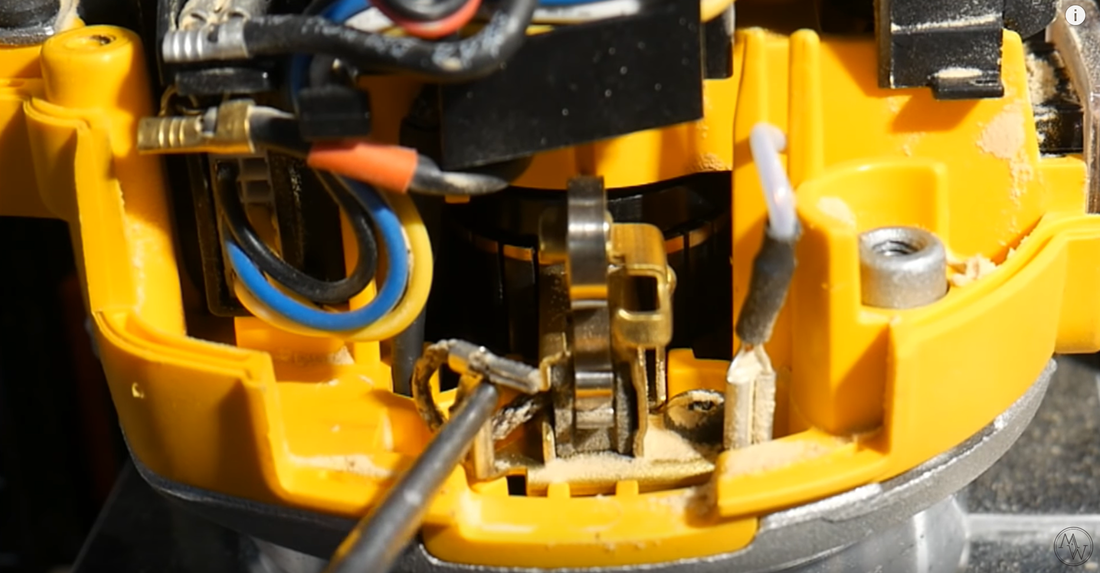 Changing brushes on DeWalt DPW 611 compact router When your router won’t turn on, nine times out of ten, it’s because your brushes need changing! Here’s how to fix this problem in ten easy steps. Although this tutorial is for the Dewalt, it will also apply to the Bosch, Ridgid, and Makita routers as well. Since this is a widely used router for the Shapeoko 3 and Inventables XCarve CNC desktop routers, it's always good to have a few extra brushes on hand. What you’ll need: T-20 torx driver(preferred) or flathead screwdriver & some sort of pointy tool or hook for spring Steps:
A few extra tips:
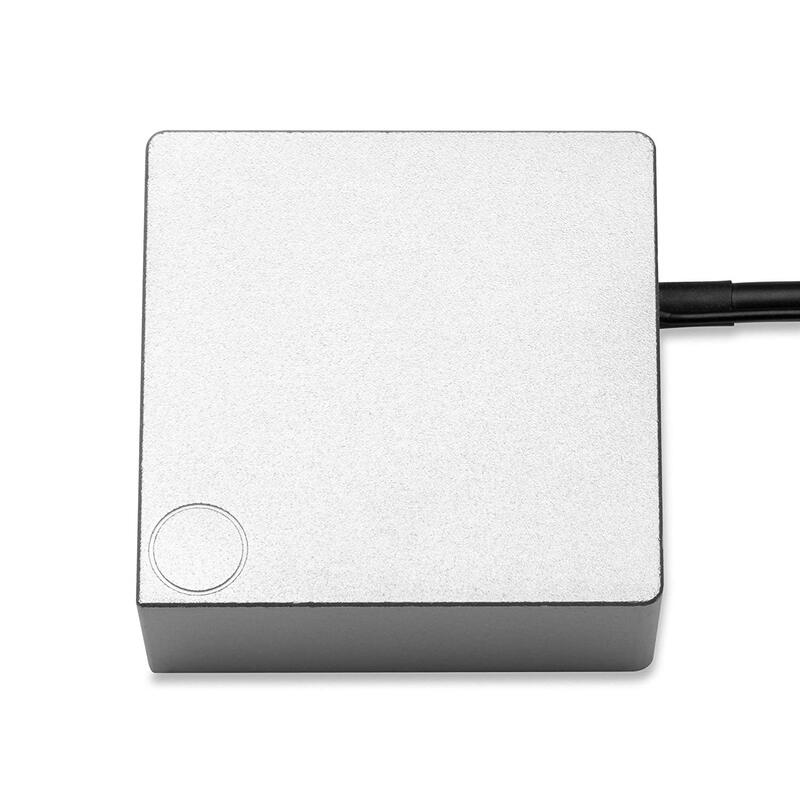
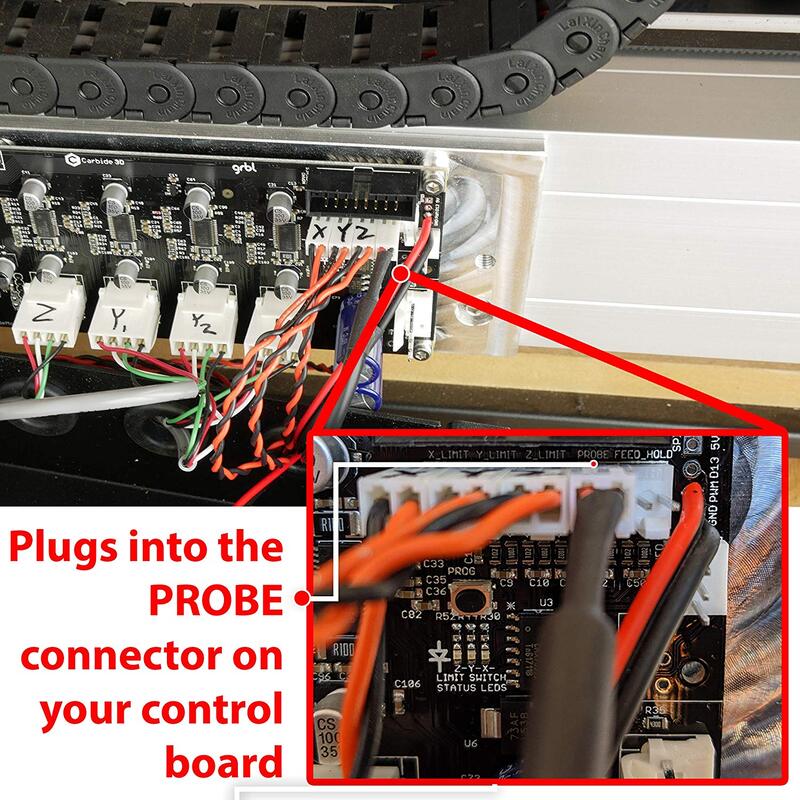
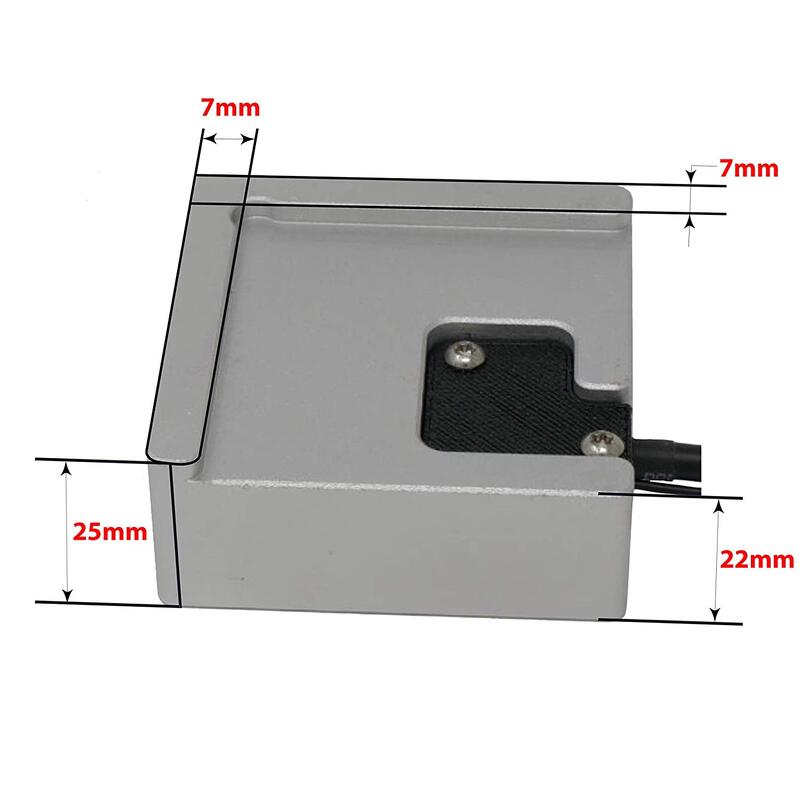
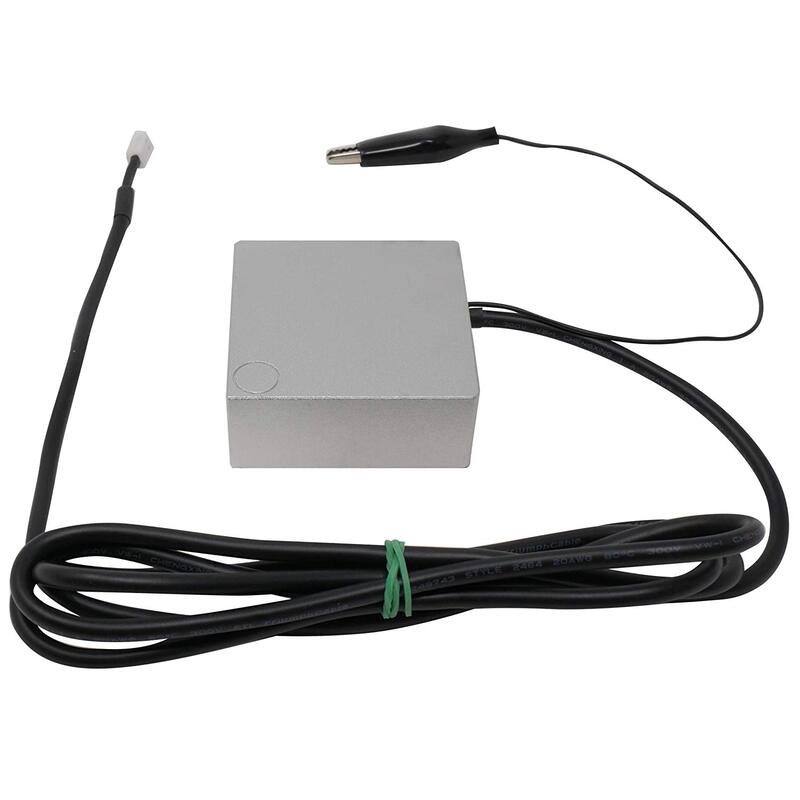
TOOLS / MATERIALS ■ Dewalt DWP 611 Trim Router : https://amzn.to/2UspwmB ■ Dewalt DWP 611 Replacement Brushes : https://amzn.to/2Z4Rt2H ■ Bosch Colt Trim Router : https://amzn.to/2CisHSj ■ Bosch Router Brushes : https://amzn.to/36FtHxM ■ Ridgid Trim Router : https://amzn.to/32oW1kT ■ Ridgid Router Brushes : https://amzn.to/2Nn73CL ■ Makita Trim Router : https://amzn.to/2qx05C5 ■ Makita Router Brushes : https://amzn.to/32h2gXS The Touch Probe allows you to quickly identify job zero (X, Y, and Z) by running the probing feature found in Carbide Motion. The touch probe from Carbide 3D is pretty expensive. I've found an alternate for 1/2 the price on Amazon. It works just as well. The one difference is that it does not have a green and red light indication (but this is not necessary for it to function). This alternative CNC Touch Probe can be used with Shapeoko 3 that use Carbide Motion. Can also be used on other CNC routers on control software that support a probe with the standard .100 (2.54mm) connector spacing. The probe supports 4 different types of probing XYZ (otherwise known as corner probing), X (to find the left edge of your material), Y (to find the front edge of your material), and Z (to find the top of your material. Can be used on Nomad 883 Pro as well, but this will require removing or rewiring the tool height sensor. Since that connection is also plugged into the 2 pin PROB connector. The kit includes aluminum probe plate a 60” cord to connect to the control board and 10 inch wire alligator clips. Features:
BUY IT USING THE BUTTON BELOW: If you need a way to store your touch probe, I 3D print a touch probe holder. You can find it on my Etsy shop, benmyerswoodshop or click the link below to purchase one! Part 4 of the series, I used some advanced features to design a wooden sign. I walk you through how to cut out multiple tool paths with endmills and v bits. Also show how to use the probe with a v bit. In this one we actually cut the sign on the CNC. I created this video series aimed at the true beginner to hobby CNC's. Although Carbide Create is made for the Shapeoko, it can be used for any CNC because it just generates G-Code. Please leave any info i left out that you want to know about in the comments below. I'll be out with more videos soon. Become a Patreon Member! https://www.patreon.com/myerswoodshop TOOLS / MATERIALS ■ Carbide 3D Shapeoko 3 XXL : http://bit.ly/shapeoko ■ Asus Rog Laptop : https://amzn.to/2R9uhvB ■ 90 Degree V Bit : https://amzn.to/2XGzMp8 ■ 1/8 Downcut Bit : https://amzn.to/2EHWlS3 ■ Suck It Dust Boot and Oops Clamps : http://bit.ly/suckitdustboot ■ Touch Probe : http://bit.ly/touchprobe ■ J Tech Laser : http://bit.ly/jtechlaser (use code 'myers' for 10% off) ■ Fein Turbo 1 Vac : https://amzn.to/2PzrZEs ■ Remote Keyboard : https://amzn.to/2QNvLi9
When I have a long carve on my CNC (Onefinity, Shapeoko, Xcarve or other brand) or 3D Printer, I like to remotely monitor it to make sure everything is going smoothly. I'd like to say, " NEVER LET YOUR CNC RUN WITHOUT YOU THERE!", but lets be real. We've all done it.
What i do is have this camera set up so I can periodically check in and make sure everything is cutting fine. In the event of a catastrophic error, I pair the camera with a wifi outlet. I have my CNC and Router plugged in to the wifi outlet and can shut if off anywhere I have internet or cell reception. Click the two links on the right to buy the same products I use. It's a small price to pay for piece of mind.
When you want a consistant X and Y zero point the best way to do that on the CNC is by using a fence. I've designed a fence to fit into my custom wasteboard. Now you can get consistent clamping and zeroing with large or small pieces. This will provide a fence for two sides of the wasteboard I designed. I use it on the front left, so that you can get a constant ZERO for X and Y. It also has an indent for the Touch Probe to fit. You can use mdf or plywood for the fence. (I prefer mdf for its lack of wood movement an ease of cutting on an endmill). The same hardware that is used to hold down my clamps are used to hold down the fence. Here's the links to the hardware (click to purchase): 1/4 - 20 hex bolts 1/4 - 20 washers Click Below to go to the Etsy Purchase Page: Here's a video I put up on my youtube channel that walks you through the steps on how to cut and create the fence from my file. Make sure to thumbs up and subscribe when your there!  Ever wanted to control your CNC when your not in front of your computer. Here's one simple solution that's less than $20 and takes zero programming knowledge.  I usually design all my things in Vetric. Sometimes, I design in Carbide Create. While it is fantastic FREE software that pairs with the Carbide 3D Shapeoko and Nomad, it does have it's limitations. One of these is the inability to export .svg files for use in other CNC cad programs. So far, i've found 3 ways of doing it. None of them are perfect, but it's better than not being able to do it at all. Option 1. Convert C2D To SVG : An amazing member of the unofficial Shapeoko and Nomad Facebook group created this simple program wrapped in an .html that works in a web browser. It's worked well for simple projects for me but it technically does not support curves. Click HERE to download Option 2. Cutrocket.com : This is a website built by Carbide 3D as a way to share projects and download completed projects for free. If you upload the .c2d file to cutrocket.com it will make a .svg preview and you can download it in your web browser (if it supports .svg file types) Option 3. G Code Ripper : This is a free program. You'd have to create your .nc G-code file with Carbide Create, then open it up with G-Code Ripper and export it to .dxf. Then you should be able to open the .dxf with a compatible CAD application. I decided to create another clamping option to assist in holding down material. I came up with these L shaped brackets. One has 5 holes that will directly fit my threaded wasteboard file, and the other has slots so you can adjust the fit anyway you'd need to according to what the material needs (I'm imagining its good for round stock). This will work on any branded CNC, but are built specifically for my wasteboard and the Shapeoko 3. Carbide Create is required to open the file, but it will create g code for use on any g code sender (i.e. UGS, Carbide Motion, Easel) Part 3 of the series, I used some advanced features to design a wooden sign. I go over using multiple bits and toolpaths, importing vectors, offset vectors, v carving, aligning vectors, along with many others. In Part 4, I cut out the sign using the g-code created from this file. I created this video series aimed at the true beginner to hobby CNC's. Although Carbide Create is made for the Shapeoko, it can be used for any CNC because it just generates G-Code. Please leave any info i left out that you want to know about in the comments below. I'll be out with more videos soon. Here's the file I created so you can check it out for yourself : Cowart.c2d (requires carbide create to open) Carbide 3D Shapeoko 3 XXL : http://bit.ly/shapeoko Asus Rog Laptop : https://amzn.to/2R9uhvB Suck It Dust Boot: http://bit.ly/suckitdustboot Touch Probe : http://bit.ly/touchprobe J Tech Laser : http://bit.ly/jtechlaser (use code myers for 10% off) |

Categories
All
“As an Amazon Associate I earn from qualifying purchases.”
Archives
November 2023
|


 RSS Feed