|
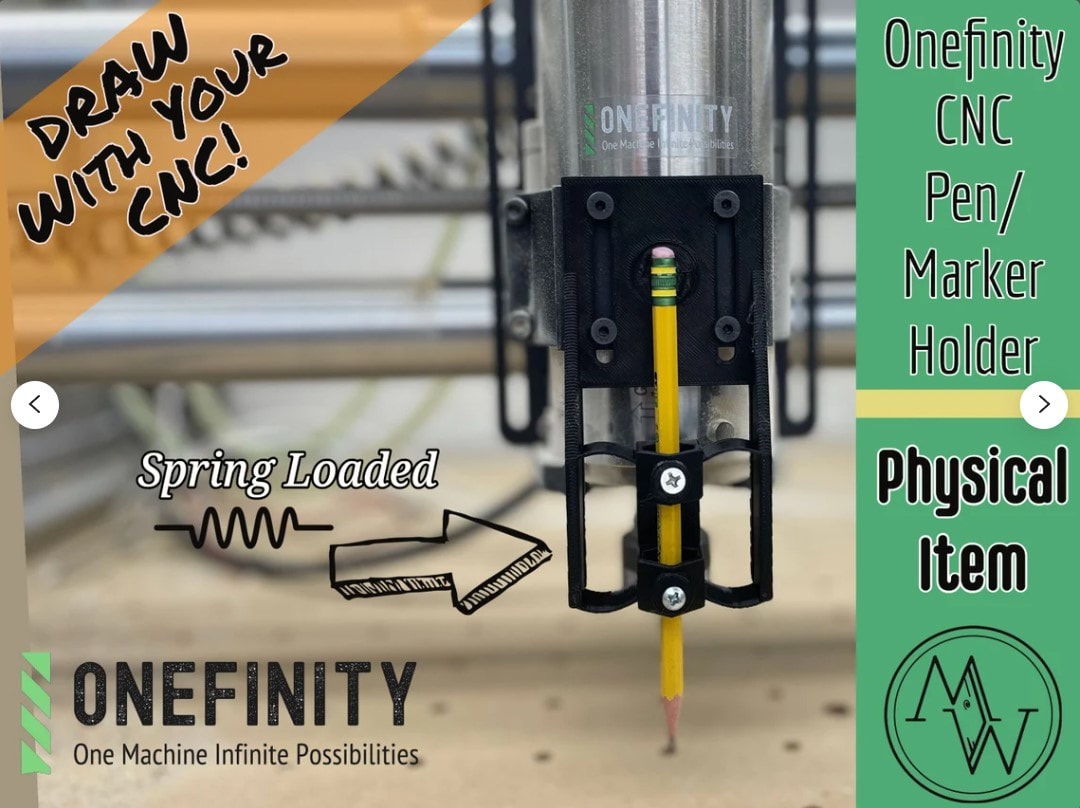
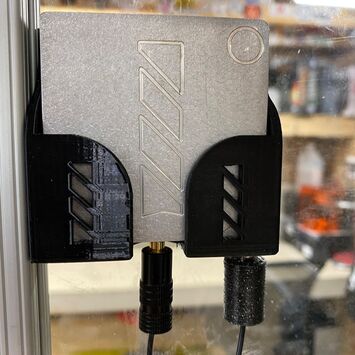
Your Onefinity CNC isn't just for cutting wood! With a laser you can engrave, but with this tool, you can turn it into a drawing machine! This is a holder for pens, markers, and pencils to turn your Onefinity CNC into a drawing machine! It's super simple to create toolpaths and make perfect works of art for all occasions! This is 'spring' loaded, the design is 'springy' without the need for a metal spring, so there is some 'give' when drawing to give even pressure. This is the perfect accessory to get the kids involved. You don't need a to have the loud router running when using this! Bonus! What you will need (does not come with) - 4 M5 bolts to hold the holder onto the z slider. - 2 fully threaded smaller screws to go through the front two mounting holes to 'secure' the pen/pencil/marker in place. Anything you have laying around the shop should do! Just be careful when tightening to not snap the 3d printed part. This is 3d printed in PLA. I typically print in black unless I'm out of stock. You may get a different color. Here's some samples files (created in Vectric 11.0) with gcode that will help you get started drawing!
1 Comment
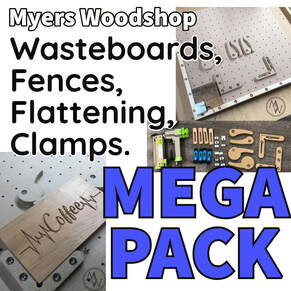
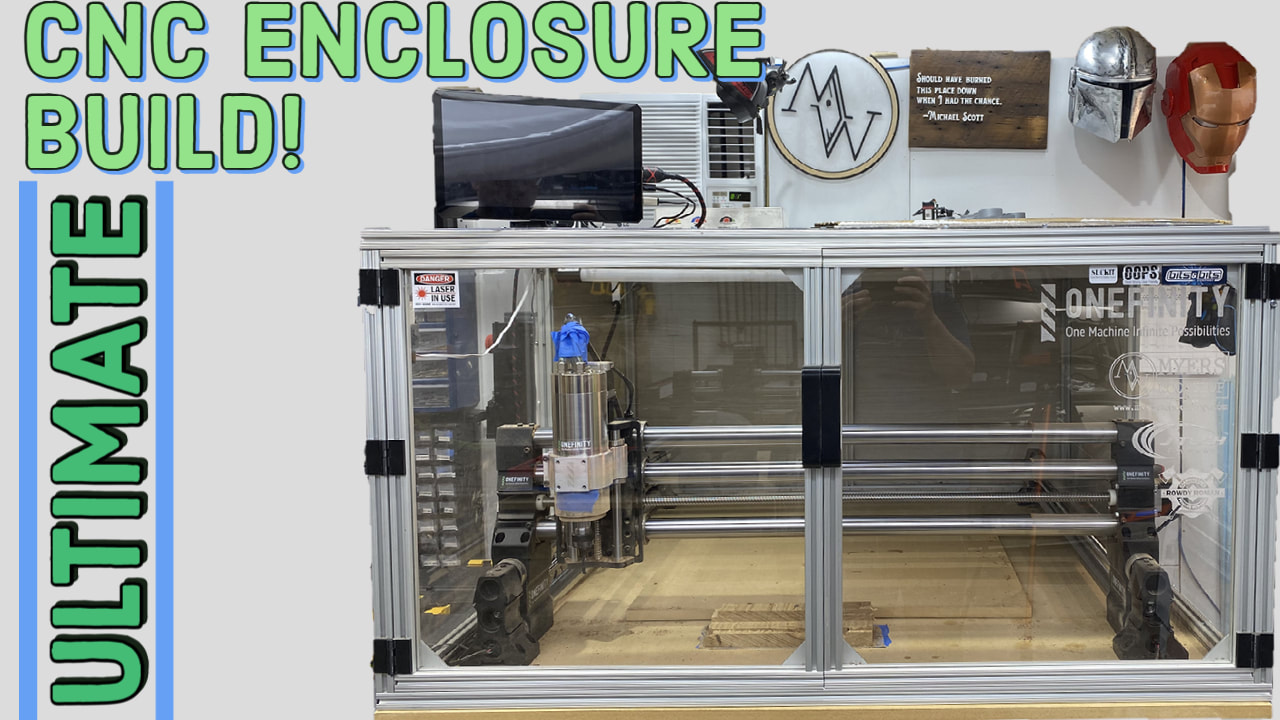
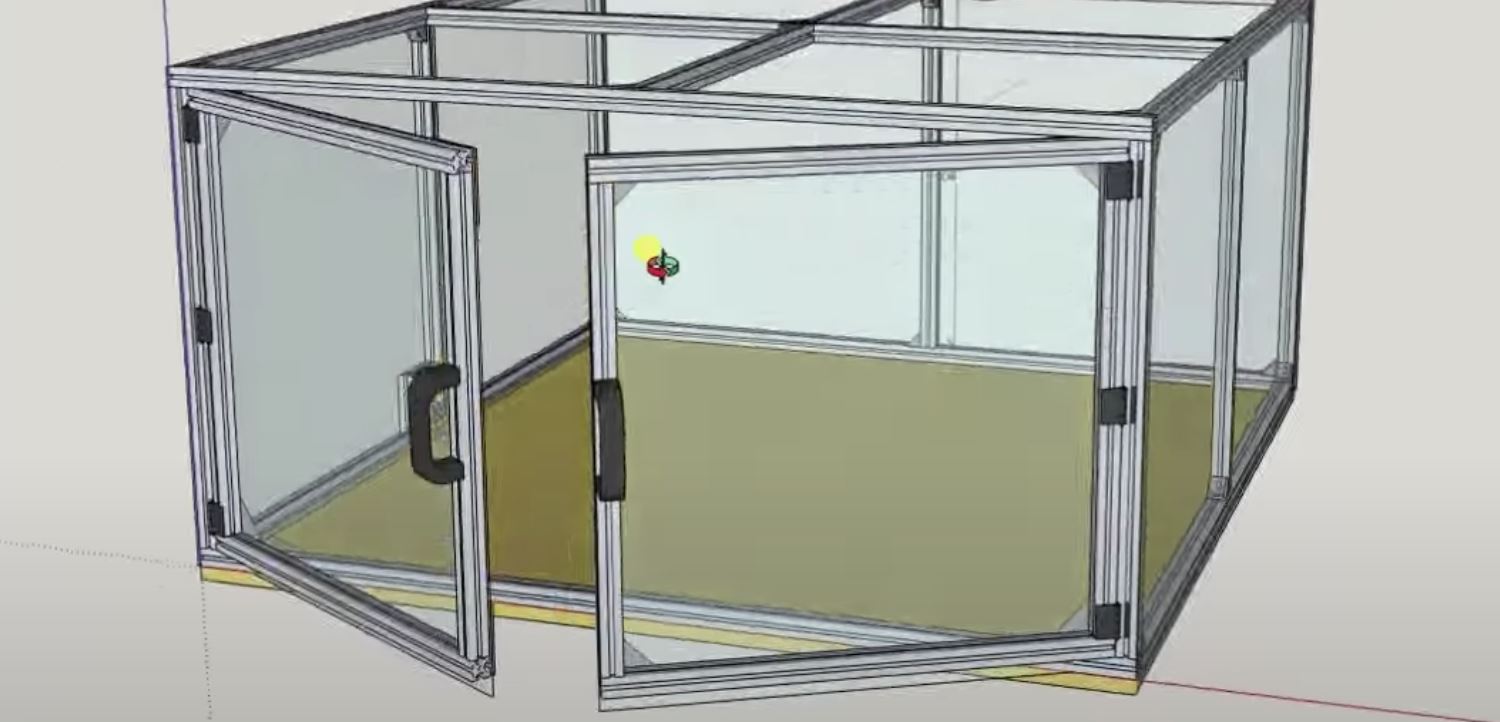
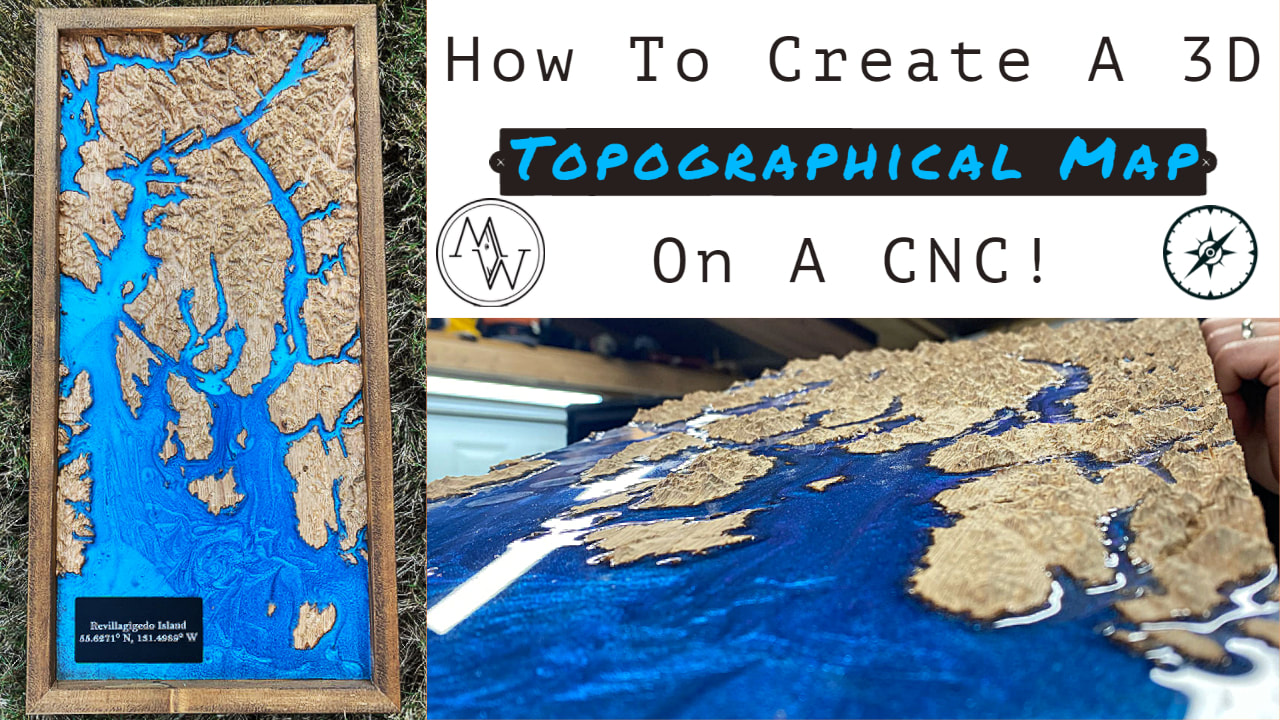
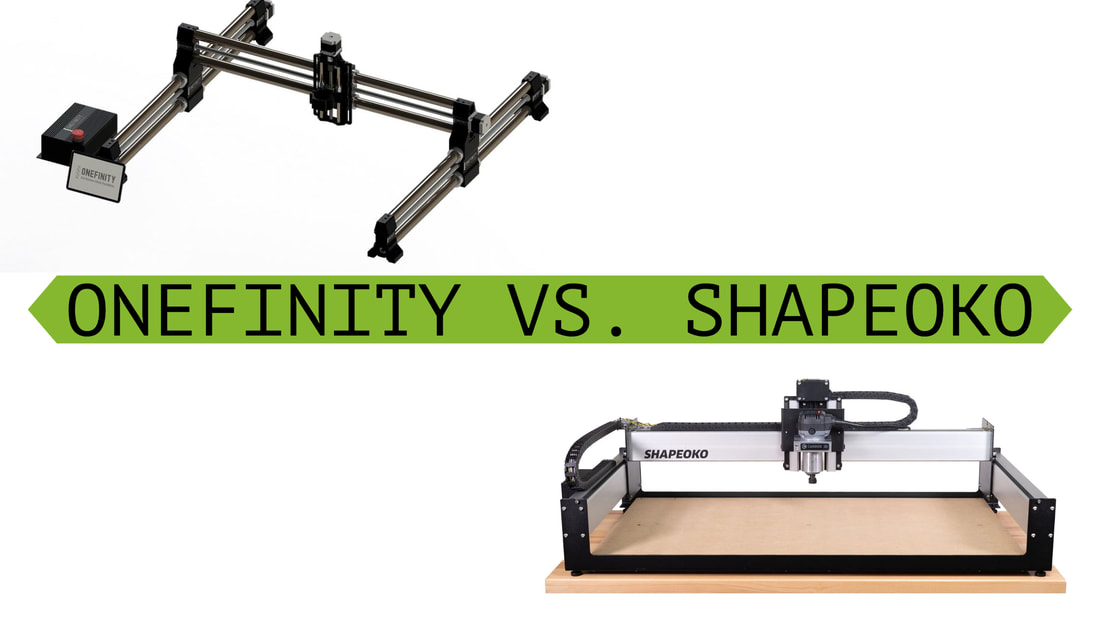
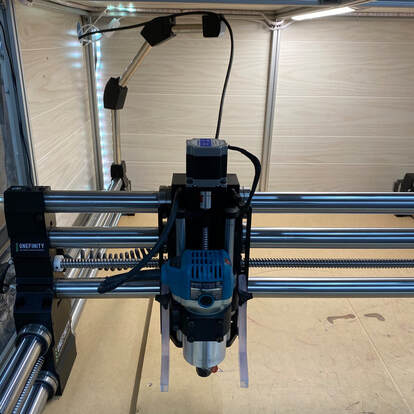
This listing is for the Digital Original Myers Woodshop V1 CNC Wasteboard Files! EVERY SINGLE FILE that has to do with my wasteboard, fence, and every clamp is in this ONE purchase! This file now includes premade Vectric files as well! It also includes EVERY size wasteboard! No matter what size Shapeoko, Onefinity, Xcarve, millright, oozenest, shark, cnc4newbies or others, this will have a size that will fit your hobby cnc! *These Files are for personal use ONLY. NOT FOR RESALE* For use on ALL hobby CNC machines including: Shapeoko, Onefinity, XCarve, Millright, Oozenest, CNC4Newbies, Shark, and many more! These file types for each item include: .crv (vectric, paid) design files (includes shapes AND toolpath information). Ready to run, just click 'create gcode' (with the proper post processor for your machine) and cut! .c2d (carbide create, free) design files (includes shapes AND toolpath information). Ready to run, just click 'create gcode' (with the proper post processor for your machine) and cut! .svg (vector images (shapes only, do not carry toolpath info) (for use with all other CAD design software) .dfx (vector images (shapes only, do not carry toolpath info) (for use with all other CAD design software) Includes: Wasteboard: 16x16, 24x24, 31x16, 31x31, 48x32 Flattening: 16x16, 31x16, 31x31, 48x32 Fence: 16x16, 31x16, 31x31, 48x32 Cam Clamps Corner Clamps Straight Clamps L Clamps Please check out these videos for help with creating and understanding the differences between file types 1) https://www.youtube.com/watch?v=6OoMsJezGUc (wasteboard) 2) https://www.youtube.com/watch?v=RdoqXafKOW0 (fence) 3) https://www.youtube.com/watch?v=0GKKOPvAH60 (common mistakes on CNC) 4) https://www.youtube.com/myerswoodshop I've put together an ever evolving Amazon list of CNC stuff I think is useful or necessary here: https://www.amazon.com/shop/myerswoodshop Want to support my work (like the upcoming V2 of the wasteboard?) Consider Supporting me on Patreon: https://www.patreon.com/myerswoodshop Listen to my Podcast (the build guild podcast) here: www.thebuildguildpodcast.com Find me on the internet: www.myerswoodshop.com www.youtube.com/myerswoodshop www.instagram.com/myerswoodshop www.facebook.com/myerswoodshop www.facebook.com/MyersWoodshop/groups/ www.tiktok.com/myerswoodshop Files created by: Vectric 11 Carbide Create V620 Last Updated 10/12/2021 Copyright Myers Woodshop 2021 Ever wanted to make an enclosure for your CNC machine? Follow along with my ultimate CNC enclosure build video! I used aluminum extrusion, acrylic, and wood panels to make mine. Most items were purchased from Amazon and Lowes. Make one yourself? Link it in the comments so we can see it! Visit https://www.rowdyroman.com to purchase the hinges, handles, and accessories in this video! Things you'll need: 10 Sticks of 80/20 Extrusion 97" long : https://amzn.to/3ba2gzr 2 packs of Extrusion connector set : https://amzn.to/3u5TKu0 1 pack 10 of L Shape Plate : https://amzn.to/3baWo8V Self Tapping Screws : https://amzn.to/2LZTknG Acrylic Sheets: https://www.lowes.com/pd/OPTIX-0-118-in-T-x-36-in-W-x-72-in-L-Clear-Acrylic-Sheet/3140717 Wood panels : https://www.lowes.com/pd/Oak-47-75-in-x-7-98-ft-Embossed-White-Oak-Wall-Panel/1000937538 VHB Tape : https://amzn.to/3aquJBO Hole Saw Set : https://amzn.to/2NbPFDP VHD/Spindle : https://amzn.to/3avQ3Gh USB C Extension cable : https://amzn.to/3arXoXm HDMI 6" cable : https://amzn.to/3rU1r4m Spray Adhesive : https://amzn.to/3qrSK15 Acoustic Sound Panels : https://amzn.to/3rZVtin LED Light Strip : https://amzn.to/3bbGzz1 4" Shop Light Bar : https://amzn.to/3dkXkdy Vacuum : https://amzn.to/3rYUXkF Tools Today Aluminum Blade : https://amzn.to/3dqFAxH Miter Saw : https://amzn.to/3qodSFg Miter Saw Stand : https://amzn.to/3asj2up Onefinity CNC : https://www.onefinitycnc.com Rowdy Roman Stuff: www.rowdyroman.com www.etsy.com/listing/964289473/myers-wood-shop-enclosure-handles-and https://www.etsy.com/listing/950334432/digital-files-myers-wood-shop-enclosure Ever wanted to make a topographical map out of wood? I made one, and I created a video that walks you through exactly how to do it step by step. The first step is to pick a place you want to make a map of. Obviously, some places are better than others. If you're doing Arkansas, where I live, your map is going to be pretty flat. If you choose somewhere with huge mountains like we did of Ketchikan, Alaska, you'll get some dramatic height differences! Once you choose a good spot, you'll need to make an .stl file of the map. What's great is that Rowdy Roman created a video on just how to do it. Once created, you can make it on a cnc or even 3d printer! Take a look at that video below. Then, we'll take that .stl and move on to Vectric Aspire in my video. Now that we have our .stl, we move on to open Vectric Aspire. We can use other CAD programs to do this if they have the ability to use .stls or 3d models, but I use and know Vectric, so that's what I'll be showing in my video. Just import the .stl in the model tab, change it to the size of your material. Make sure to drop the slider to include the very bottom of the model, and change over to the 3d roughing toolpath. I used a bigger flat endmill to hog out most of the material. Then I change to a finishing toolpath with a very fine tip to capture all the detail. I go into really deep detail in the video linked below of the whole process. Once done, we mixed some resin epoxy with some blue pigment to fill in the depths where the water would be on the map. This gives it an amazing 3d effect and really pops in contrast from the land mass. We gave it a light coat of poly, did a simple stained frame and it was done! It's a lot easier than you may think! If you want to see examples of the .stl and the Vectric Aspire files, I've linked them below: If you make one, drop a comment with links to it so we can check it out! Happy creating! Upfront Disclosure. Onefinity AND Shapeoko sent me their machines, FOR FREE. Shapeoko asked that I show of their machine when I used it, Onefinity asked that I beta test the machine and help improve the machine and push it's limits for them.*Check the end of this article for views on the pro/4/HDM* If you’re looking at CNC – computer numerical control machine – you’ve probably come across the Onefinity and the Shapeoko CNC machines. If you've been following me on social medias, you've seen me use both machines. Both CNC machines work in a very similar way, but will create 2, 2.5, and 3D cutouts of the same materials. They are both designed to be affordable desktop models to be used by hobbyists, home business, and small business alike. They're also priced around $2,000 us making them a solid choice as a first CNC machine. The question is – which one should you buy? I get asked this daily, so I figured I'd write up a post about the differences between the two and which one I've decided to keep in my personal shop. Click the "read more" below to read the full article. If you've watched me beta test the Onefinity CNC Woodworker over the last 6 months you've probably asked yourself, what are you going to do with the router cable? It just drags behind the machine. Or, are you going to hang your vacuum hose from the ceiling with a bungee cord like before? These are valid questions. One I've been struggling with. Thankfully, an Etsy user came up with a solution (before I did, congrats man). The Vacuum and router hose boom. RowdyRoman came up with this little arm that attaches to any of the 4 corners of the Onefinity CNC machine. Since the woodworker and machinist editions use the same feet, it can be used on either machine. I installed mine on the back left of my enclosure, as that's where I have the hole for my router/spindle wires and vacuum cord. The hole of the base piece is slightly oversized to allow the arm to swivel when the machine moves in the extreme 4 points. There's a channel down the middle for the power cord to sit, and the vacuum sits right on top of that channel. If you have a permanent vacuum for the CNC, there are slots for a zip tie to attache the hose and cable so they will not fall off.
The Router Cable is on of those items that I think are a MUST buy with the Onefinity CNC. It's the perfect solution for cable and hose management. Check out RowdyRomans video below on how it's used:
Purchase it here:Here's a video describing how to use it:
You did it! You just purchased A CNC. If this is your second (or 3rd or 4th :P ) CNC than you know what your getting into! If this is your very first step into the CNC world then you're probably feeling excited and a bit nervous! I remember when I got my first CNC. That feeling of excitement when UPS pulls up to the house and drops it off. Taking that first picture of the unboxing for Instagram. Painstakingly going through the instructions making sure I assemble it just right. Then, taking a step back, looking at what I just built, and thinking "Ok, how do I make this thing work?"
In this post, i'll be referring to the Onefinity CNC, as this is the current CNC I have, but this will be helpful for most every CNC on the market. 1: Router
Or Spindle Click HERE to buy the spindle Click HERE to buy the spindle
Ah, a proper spindle. If you've been doing your research on CNC machines you've inevitable seen many posts about getting a spindle. Since I'm one of the few with a machine, I'm obviously getting tons of questions about it. And the 'can this run a spindle?' was one of the top requests. So, without ever using one, let alone ever seeing one in person with my eyes, I made a leap of faith and purchased one from amazon. I've created a video all about that HERE (Link to come once I actually edit the video). I'll sum up the video by saying this: It is super quiet and it is not worth the hassle for 95% of you buying the machine. If you are brand new to CNCs, stop right here and skip to the next section. A spindle is not for you. If you are more 'seasoned', a spindle may be for you. I've realized why very few hobby cnc machines officially support it. You have to wire EVERYTHING yourself. And by that I mean, it literally comes with no wires. Wiring 2 and 3 phase stuff that could potentially KILL you is probably not something they want to promote...and only a finite amount of people will actually use one, so it's not worth the liability, support, and $$ to promote one. That being said, it will be really hard to go back to the ear deafening sound of a router now that I've run a spindle.
2: BITS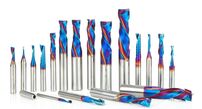
A router or spindle are great at spinning around but they wont cut anything without a bit inside them. There are countless options in this, each with their own specific purpose. I've already written up a pretty lengthy blog post previously on my preferred bits and that applies to the Onefinity. You can check that out by clicking the button below.
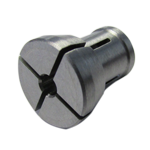
Collets. A Collet is an adapter to hold different sized bits. Every bit has a cutting diameter and a shaft diameter. The Makita router (and most routers) comes with a 1/4 collet. This means that you'll only be able to use 1/4 shanks (the smooth shaft part that goes into the router). Some smaller bits (like a 1/16 or 1/32) only have 1/8 shanks and will not work in the standard collet. You'll need to purchase a 1/8 collet. A great place to buy very good collets is Elaire Corp. I linked a button to their Makita selection below.
3: Wasteboard
Since the default configuration of the Onefinity CNC is open on the bottom, once you attach it to the table you'll want to provide a sacrificial wasteboard as a carving surface and a place to hold down your material. I'm kinda biased here...but I've designed one that most people refer to as the "Myers Wasteboard" (or mEyers if you can't spell my name right). I think its the best one you can get, but i'll leave that up to you. All you'll need is a piece of MDF and your machine will do the rest of the work. The file is specifically designed for the Shapeoko 3 but since it has very similar cutting sizes, it will work perfectly for the Onefinity CNC as well. (Version 2 with Microjig is coming soon) There's plenty of info about this out there so I'll link the relevant stuff below:
4: Clamps
3: Cam, fence, and L clamps. To go along with my wasteboard I designed a bunch of different clamps. I've created a blog post and YouTube video to explain them. They work really well and leave no marks on your material. Also, since they are low profile and made from mdf, you don't have to worry a about running into them with a bit and breaking the bit or the clamp. The video and files were designed for the Shapeoko 3, but will perfectly apply to the Onefinity (and any other CNC) just as well.
5: CAD (Design Software).
Carveco was gracious enough to provide a discount code for my followers. Use code "myerswoodshop" for 5% off!
I have made a bunch of videos showing how to use Carbide Create (free). I'll be doing more on other software in the future. Check out my Carbide Create series below.
6: A Computer
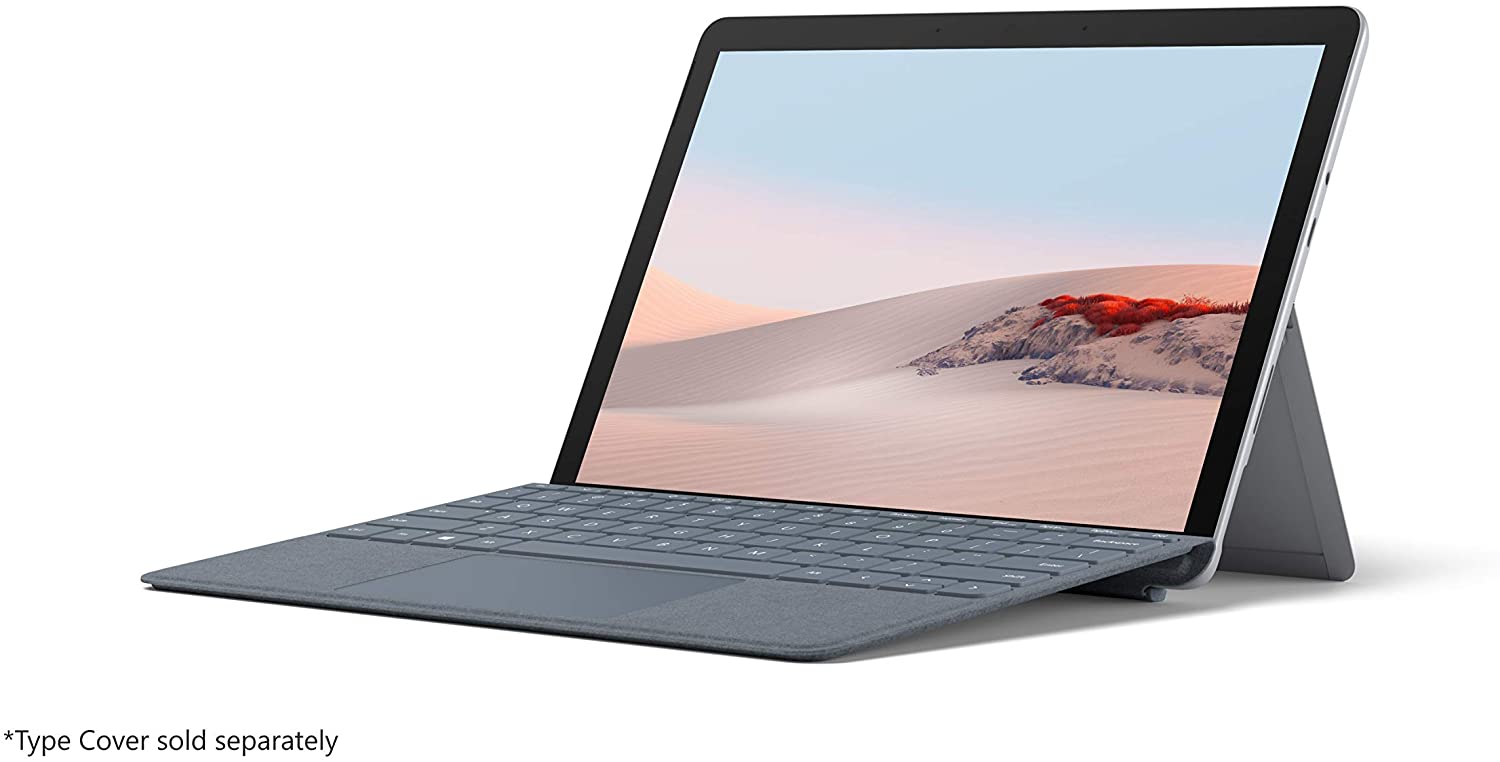
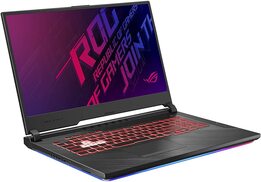
You'll need a computer for one of two reasons (or both in some cases) for CNC machines. The first is programing the CAD (design) software. The second is actually sending the gcode created from that CAD program to the CNC machine (by using CAM software (motion control)). For most hobby cnc machines you'll need to be teathered to the cnc via a usb cable during the whole cut. For the Onefinity CNC machine, you do not thanks to its controller with built in cam software. For designing CAD, you'll want something a bit more powerful (especially if your designing 3d files and not just 2d). For running CAM, usually a inexpensive computer will do just fine as its just streaming a small set of data over usb. I'll link my two favorite computers I personally use. Click the pictures to purchase.
7: USB Stick
8: Joystick (Another Form Of Jogging)
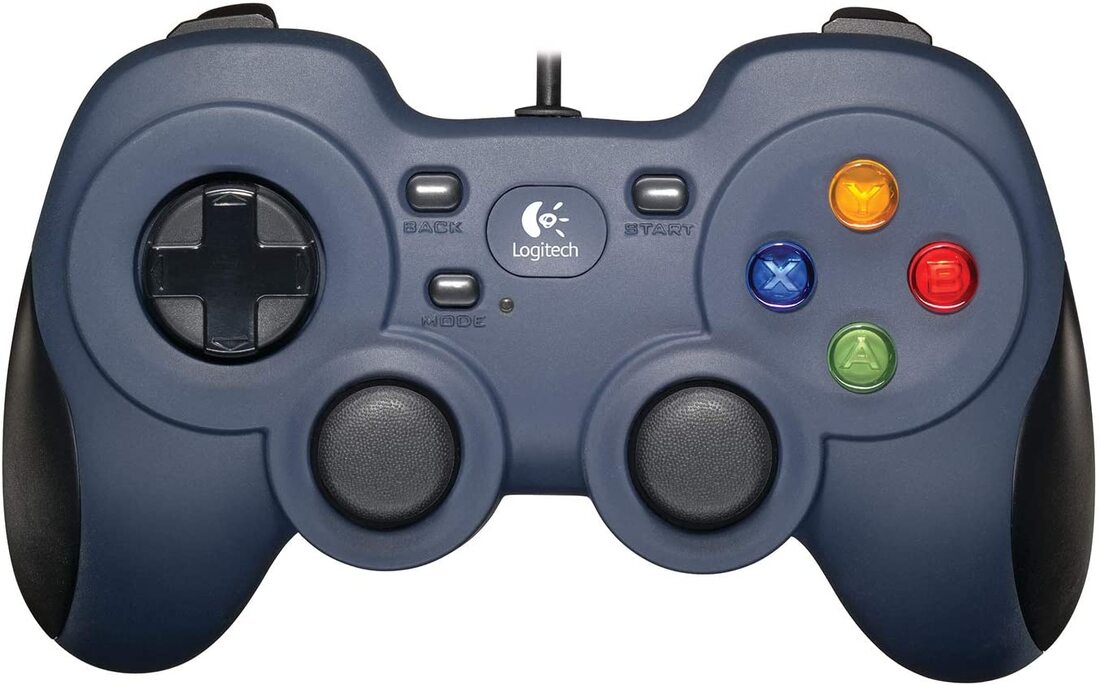
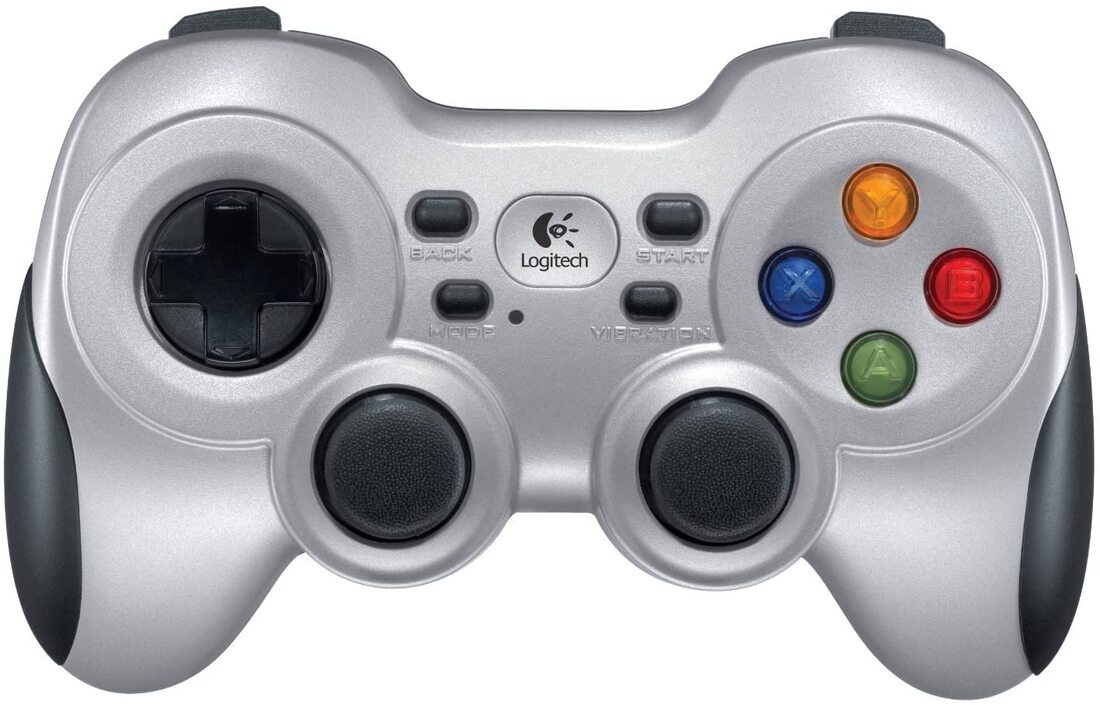
There are many ways to jog (move) a cnc machine. Most included using the mouse and clicking on a computer screen. Some machines have the ability to connect a game pad to enable jogging. This is a nice feature as you can stand directly in front of the machine and watch it move rather then watching a screen. The Onefinity allows the use of game pads. I linked two below that I've personally used and tested (clcick the pictures to purchase). The blue one is a wired one, the silver one is wireless (I personally recommend going wireless!).
9: Webcam
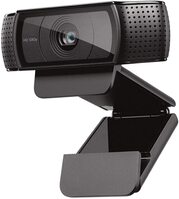
Once you get cutting it's not really ideal to stand in-front of the machine for hours (although its NEVER recommend to not monitor the cutting process, you never know what could happen!) Fortunately we live in an always connected digital age. There are two ways you can remotely monitor the cut. One way that is specific only to the Onefinity is plugging in a usb webcam to the controller. If you do this, a box will pop up on the screen (that you can access from any device on the network) with a live video feed from that webcam. It's a really cool feature. I used two webcams (one a 720p and one a 1080p) and they've both worked perfectly. I'll link them below, click on the pictures to purchase.
10: Vaccum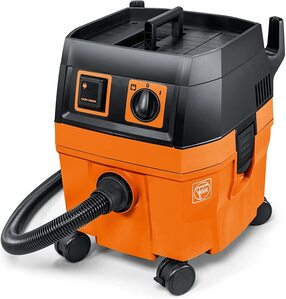
The unfortunate side of cutting on a CNC machine is dust. Lots and lots of dust. Some material is worse than others. MDF is particularly bad for your lungs, and cutting it creates A LOT of dust. The Onefinity CNC supports (and all preorders get) the Suck It Dust Boot. This allows dust collection right at the point of cutting. Now you'll need a vacuum to suck up the dust. Unfortunately most vacuums are very loud. Add that to the fact that the routers are really loud and it's especially uncomfortable for your ears. I've had a shop vac in the past. They work well but are over 80 decibels. While researching other vacuum alternatives, I found Fein. They are German made, have the quality of Festool vacuums and are much cheaper. The best part is that its less than 50 decibels while running. It's one of the quietest vacs on the market and is still going strong 3 years later!
11: PPE (Safety Equipment)
12: Touch probe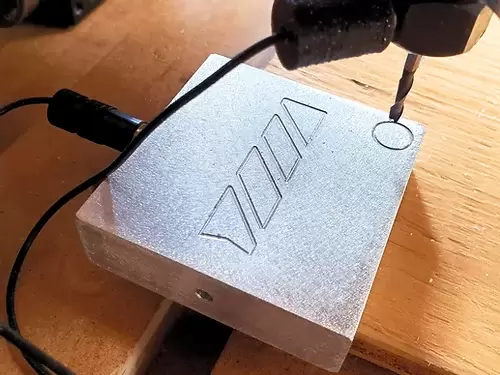
The basic principle of this type of probe is that the continuity of an electric circuit is broken when the probe touches a feature in the XY plane at a given Z position or touches a surface in the Z direction at a given X & Y. This lets the machine know where the starting point to cut on the material is. While a touch probe is not a necessity, it makes finding zeros more automated. Most any touch probe will work with the Onefinity, however they sell their own branded probe that is plug and play.
13: Material
Finally, you'll need something to cut. The materials you can cut on a CNC would be wood, acrylic, plastic, chipboard, aluminum, brass, linoleum, brick, hdpe, pvc, and many more.
Summary.
Hopefully this post was helpful in what to expect when you purchase a new CNC. If you have any questions, feel free to write them in the comments. If you can think of anything to add, send me a message and I'll edit this post.
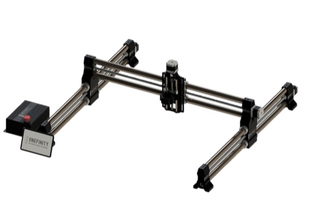
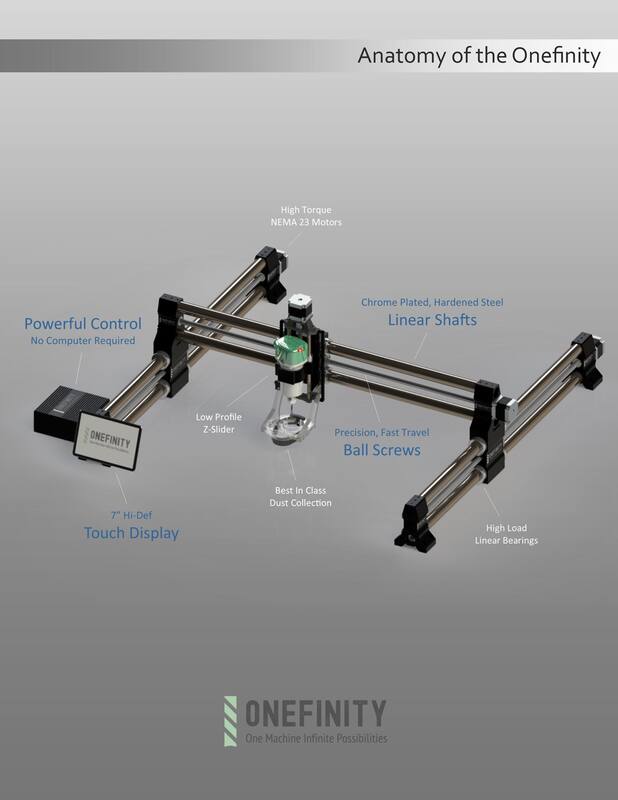
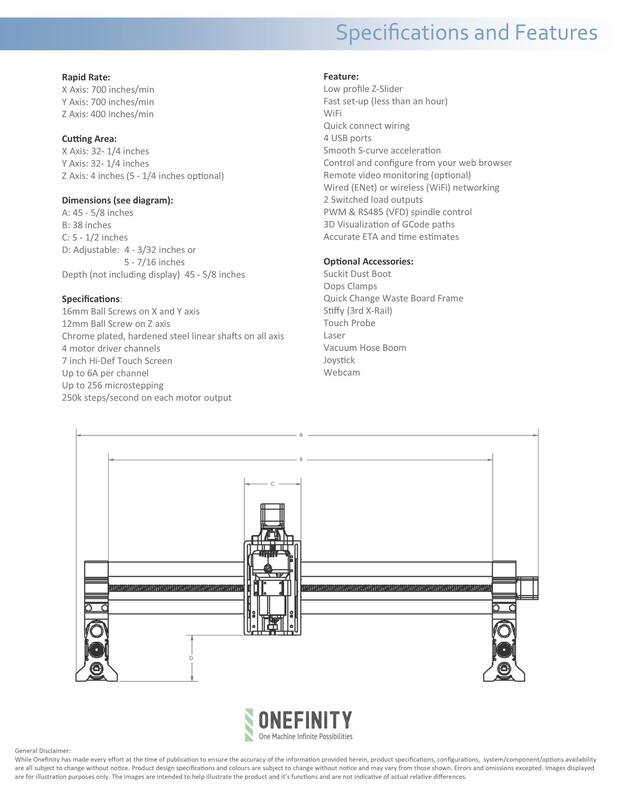
Happy cutting! Ben ' I'm happy to say I have the Onefinity CNC in my shop! Made by the people behind Suck It dust boot, it's an all axis ball screw machine in a modular design that only took me less than 15 minutes to breakdown in my shop and move, set up and cut in my friends shop. Remember when you put together the Carbide 3D Shapeoko and it took a full day...or worse, the Inventables X-Carve and it took 5 FULL DAYS! From unboxing to cutting you'll be done in less than an hour (it took me 15 minutes). Moving the other machines takes two people. You can move and set up this one by yourself. The beauty of this machine is when you want to move it, you can move one rail at a time. You don't need a truck or large suv to move the Onefinity. I took it over to my friends shop in my wifes car. I'm a huge tech nerd so anytime you put wifi in something I'm all in. The controller is something special. It's basically a computer inside. Gone are the days where I have to hook up a usb cord from my computer to the controller on my cnc machine and tie it up until the piece is finish, or worry that my computer or usb might go to sleep in the middle of the cut and I lose hours of work. Also, who want's to take their expensive laptop in the shop to get dusty or drop it? Once you have your design done and you save the gcode file, you simply put it on a usb stick or log into the controller via your network (if you choose to do this, wifi/internet is NOT a requirement for it to run) and transfer the file. Simply zero your work piece via the touch screen and click start. If you've used cncjs or ugs you'll love the feature that shows the simulation of tool paths while it's cutting. The Onefinity has that feature built in as well. You can monitor your cut and it's movements while it's cutting. That's really handy when you're trying to avoid cutting into your clamps. The awesome part of optionally connecting it to your network is the ability to use your phone (or tablet) to control the machine! I always have my phone on me and love the fact I can control it from wherever I am. If you hook up a usb webcam (any of the shelf usb webcam will work) a screen will show on the controller page of the camera's view. You can watch your machine cut directly from the screen! This is perfect for those long jobs when you want to head back in the house to catch an episode of Tiger King on Netflix but still want to monitor your cnc for any 'mishaps' that may happen. You basically created your own cnc baby monitor. The controller also has hook ups for VFD (for when you want to graduate from a trim router to a spindle) built right in. I have a usb gamepad controller hooked into mine for when I want to jog the machine while not directly in front of a screen. Almost too many options for jogging and control. There's a larger z height than I'm used to on this machine which allows me to cut thicker stock. And if I raise up the rails I can put as thick of a stock as I'd like underneath. I could even potentially place it on top of a completed table and carve in a design. That's a huge up sell if your created custom furniture. The Linear bearings are sealed so there's no need to worry about dust entering them. I constantly had to clean my v wheels and the rails that they road on to keep them smooth before. Ever have a belt snap in the middle of a paid job or a rubber v wheel break in half? You either have to start all over or wait to get a new belt or v wheel from amazon. With ball screws that problem goes away. As for maintenance, after a certain amount of hours on the machine, simply apply oil in the ball screw hole and that's it. I've seen way to many complain about making my wasteboard and it not drilling the holes all the way through. 99% of the time the problem was the stepper motors skipping steps because the belt was loose. Belt stretch is real. When you get your new machine or new belt you account and adjust for the belt. After time rubber will loose its elasticity and stretch. This will cause your circle to come out ovals. Ball screws eliminate that problem too. Since the controller has built in cam, you'll just need to provide your own CAD program that can create files. I've tried Carbide Create, Easel, Fusion 360, Meshcam, Solidworks and Vetric Aspire (Vetric is my go to) so far. All work just fine. I intend to try out Carveco soon. It's highly likely that those will cover 90% of the users out there. Basically, If your CAD program creates gcode, you'll more than likely be able to run it one the Onefinity. The Onefinity uses the proven nema 23 motors just like the xcarve and shapeoko 3 does. Rapid movements are increased up to 700 inches/minute on x and y and 400 on the z. Bottom line, it's pretty fast for a hobby CNC. Faster than what I'm used to. I've been using the machine for a couple of months now and I've had zero issues thus far with rigidity. The rails have been doing a great job keeping things rigid. I'm cutting at faster IPM's than I have thus far. I could basically use the rails as a pull up bar and there wouldn't be flex. Overall, I think the Onefinity is a great addition to the hobby / desktop cnc scene. It offers the higher priced machine features that more expensive machines carry at an affordable price (which I EXPECT to be priced in the same ball park with xcarve and shapeoko. We will find out for certain in May 2020). Check out the videos below to see more of the Onefinity in action. Hit me up with any questions or comments. Happy Cutting, -Ben Find Onefinity at their website www.onefinitycnc.com Also, follow them on social media: Below are the specifications of the machine:
The following are some YouTube Videos of the Onefinity CNC machine. You guys know me for my work with the Shapeoko 3. It's been a good machine but with some caveats. Belt stretch and breaking, Z movement loosing steps, very heavy to move by yourself, and needing a computer to be constantly tethered to use it. In comes the Onefinity. Created by the people who make the Suck It dust boot, this machines solves all the major faults of the Shapeoko and Xcarve. X, Y, and Z Axis use ball screws standard. Linear Bearings on all axis, no belts anywhere to be found. The controller is so powerful that it runs its own built in software so no computer needs to be connected to it to send or run files. Finally, no computer is needed in the dusty shop. I'm one of the first 'influencers' to receive this beast so make sure to be following me on Instagram, Facebook, and YouTube. I'll be sure to post lots of videos about the machine and its capabilities. Check out their announcement video below. You can find Onefinity CNC at www.onefinitycnc.com. Make sure to follow them on Instgram and Facebook as well @onefinitycnc. Can't wait to show you what it's all about! Happy Cutting! -Ben |
Categories
All
“As an Amazon Associate I earn from qualifying purchases.”
Archives
November 2023
|
|||||||||||||||||||||||||||||||







 RSS Feed