Myers Woodshop
  • Home
  • Blog
  • Shop
  • YouTube
  • Tools I Use
  • Merch
  • Build Guild Podcast
  • Patreon
  • Contact
  • FAQ
  • Home
  • Blog
  • Shop
  • YouTube
  • Tools I Use
  • Merch
  • Build Guild Podcast
  • Patreon
  • Contact
  • FAQ

I Upgraded My Laser To The Aeon Laser Us Mira 9 100w!

3/14/2021

2 Comments

 
Picture
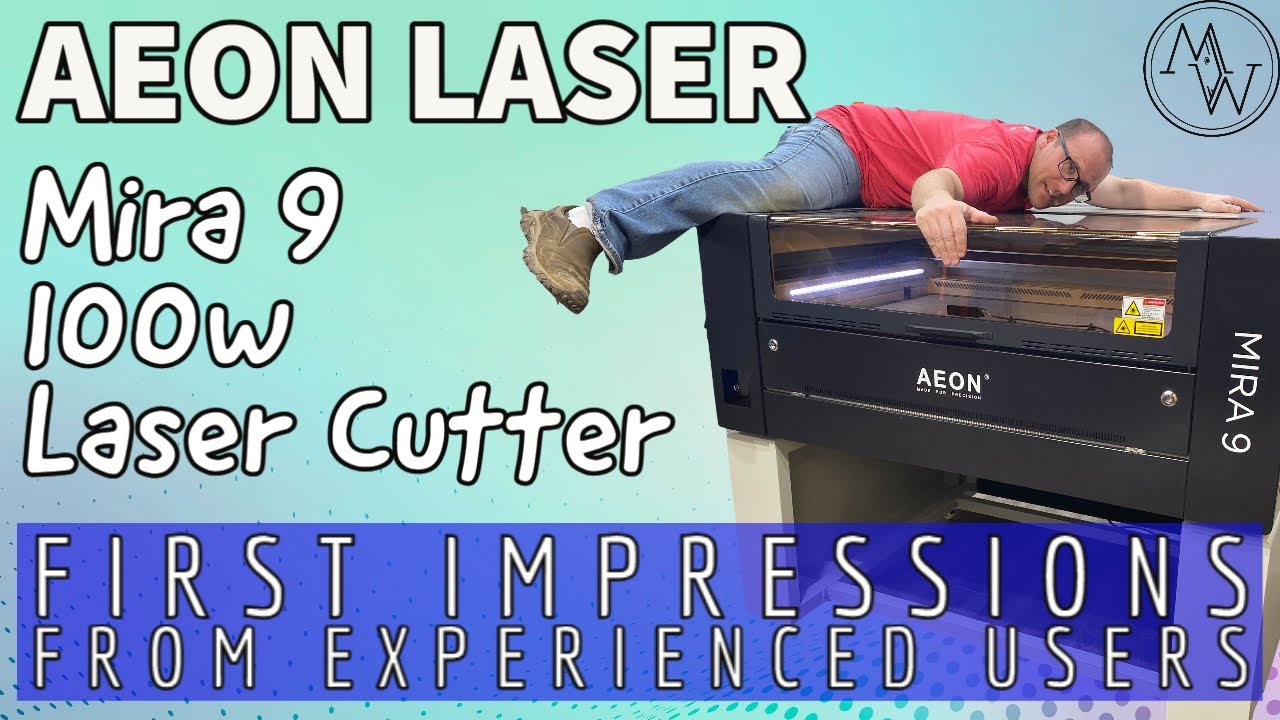
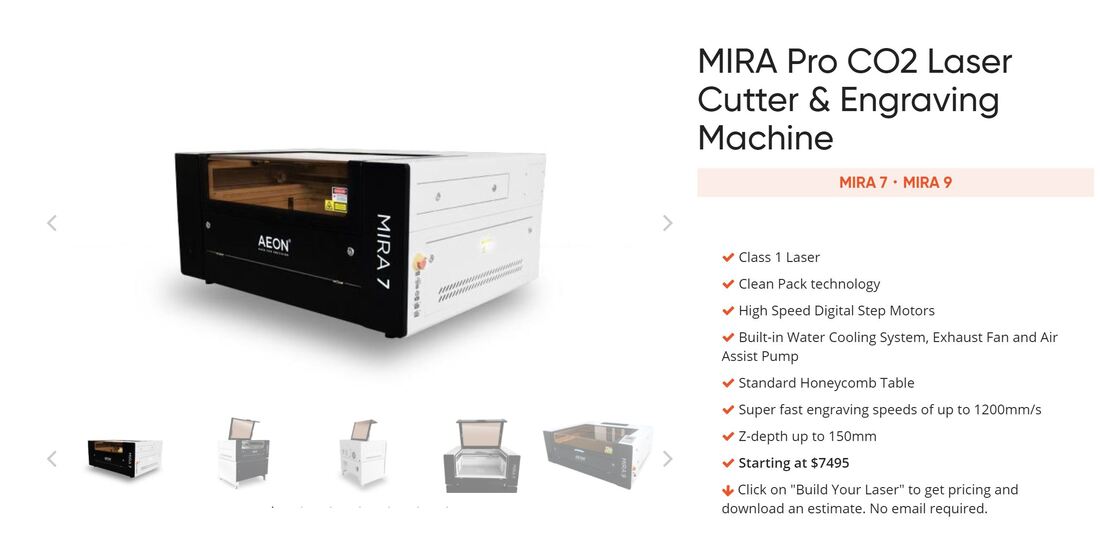
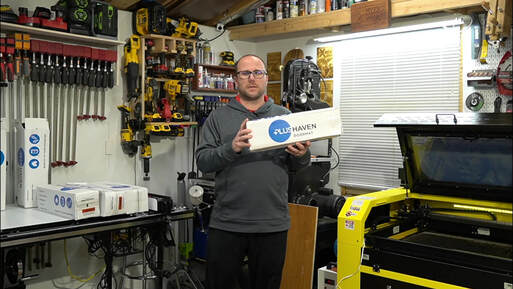
If you've been following me on YouTube or social media, you've seen me us a bunch of lasers, most specifically, the black and yellow OMTech 60w.  While it's been a great laser, it's on the lower end of the features and price range for a co2 laser.  It was time for an upgrade to a more powerful laser with more features.  This is when I found Aeon Lasers!  Aeon Laser USA is located in Melbourne, FL. With over 12 years of experience, they provide an incredible amount information and training.  They care that each customer gets up and running and know how to use their laser.
Visit Aeon Laser US.
Picture
The Mira Pro Mira 9 features a 23.625 x 35.5 (900x600mm) cutting area.  The Mira also includes the water chiller, exhaust fan, and air pump built INTO the the machine, therefore not taking up any extra space or hidden add on costs.  All included in a clean, tidy, well built package.
What's more, Mira US goes through each machine with a fine toothed comb, replacing all wiring ensuring it's up to the highest US code.  I have piece of mind knowing that safety of the internals is not something I need to worry about. 
Picture
Some other key features included a dedicated rotary port, large open window for viewing with a safety switch, full led lighting, motorized z, auto focus of z, faster engraving speed, built in WIFI, and incredible customer support, training, and online instruction.
So far, I'm extremely happy I've made the upgrade.  When considering a CO2 or Fiber laser, take a serious look at Aeon Laser US as a contender!


2 Comments

Ultimate CNC Enclosure Build

2/16/2021

1 Comment

 
Picture
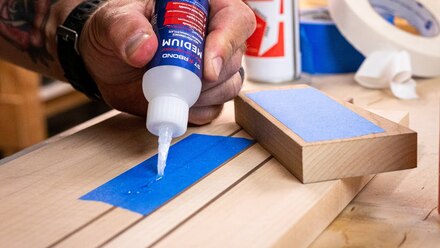
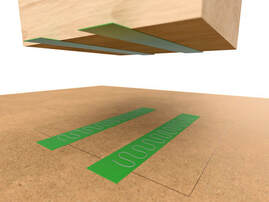
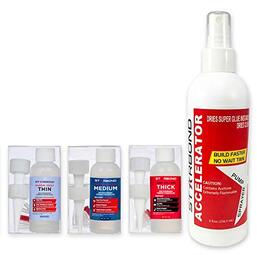
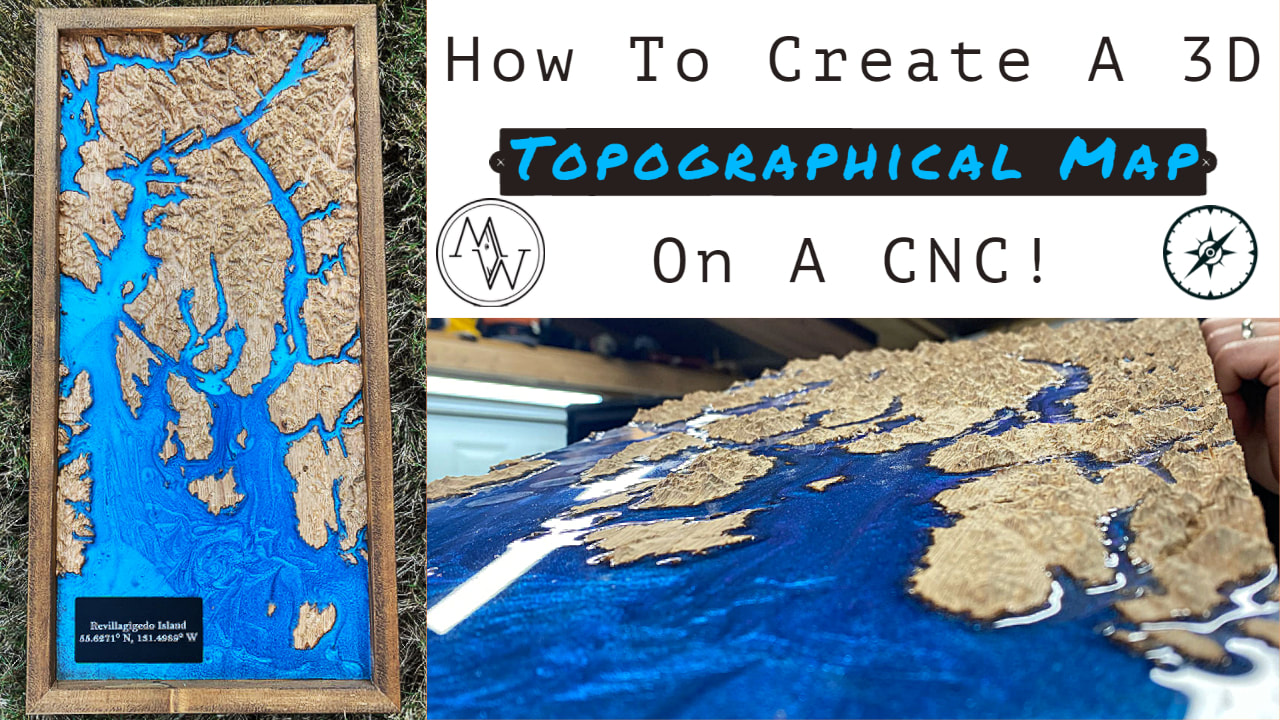
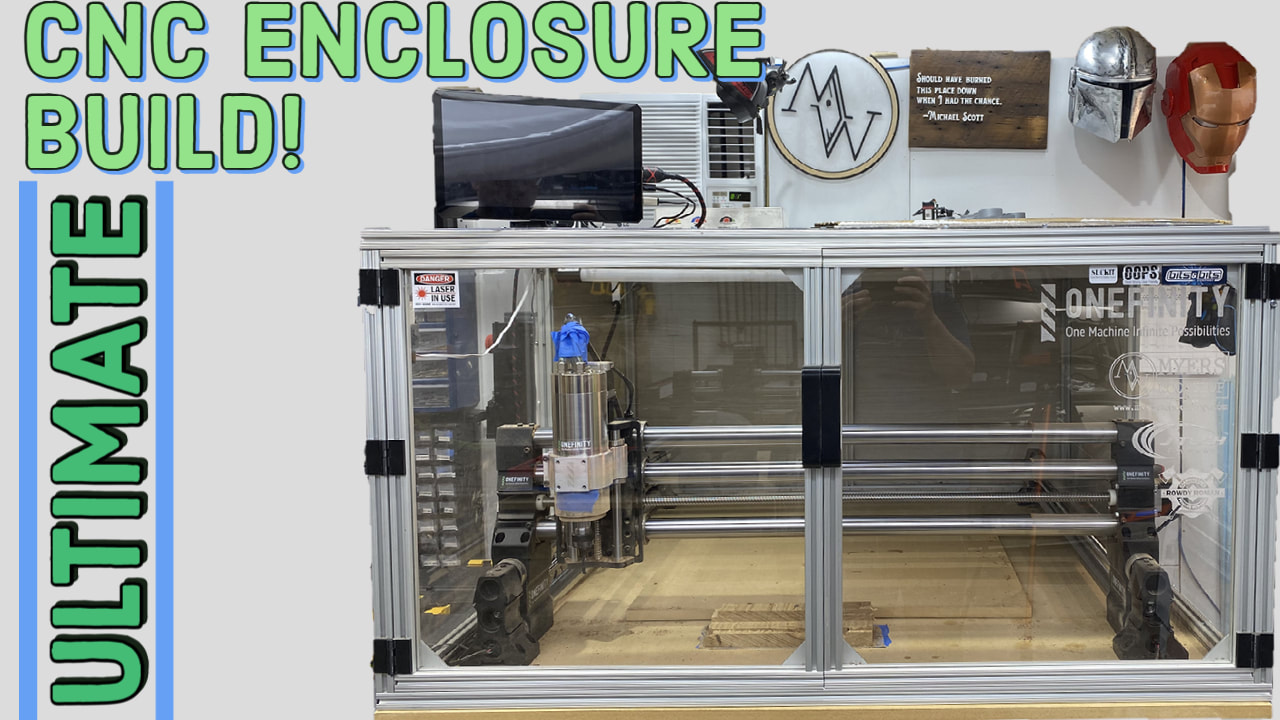
Ever wanted to make an enclosure for your CNC machine? Follow along with my ultimate CNC enclosure build video! I used aluminum extrusion, acrylic, and wood panels to make mine. Most items were purchased from Amazon and Lowes. Make one yourself? Link it in the comments so we can see it! Visit https://www.rowdyroman.com to purchase the hinges, handles, and accessories in this video!

Things you'll need:
10 Sticks of 80/20 Extrusion 97" long : https://amzn.to/3ba2gzr
2 packs of Extrusion connector set : https://amzn.to/3u5TKu0
1 pack 10 of L Shape Plate : https://amzn.to/3baWo8V
Self Tapping Screws : https://amzn.to/2LZTknG
Acrylic Sheets: https://www.lowes.com/pd/OPTIX-0-118-in-T-x-36-in-W-x-72-in-L-Clear-Acrylic-Sheet/3140717
Wood panels : https://www.lowes.com/pd/Oak-47-75-in-x-7-98-ft-Embossed-White-Oak-Wall-Panel/1000937538
VHB Tape : https://amzn.to/3aquJBO
Hole Saw Set : https://amzn.to/2NbPFDP
VHD/Spindle : https://amzn.to/3avQ3Gh
USB C Extension cable : https://amzn.to/3arXoXm
HDMI 6" cable : https://amzn.to/3rU1r4m
Spray Adhesive : https://amzn.to/3qrSK15
Acoustic Sound Panels : https://amzn.to/3rZVtin
LED Light Strip : https://amzn.to/3bbGzz1
4" Shop Light Bar : https://amzn.to/3dkXkdy
Vacuum : https://amzn.to/3rYUXkF
Tools Today Aluminum Blade : https://amzn.to/3dqFAxH
Miter Saw : https://amzn.to/3qodSFg
Miter Saw Stand : https://amzn.to/3asj2up
Onefinity CNC : https://www.onefinitycnc.com


Rowdy Roman Stuff:
www.rowdyroman.com
www.etsy.com/listing/964289473/myers-wood-shop-enclosure-handles-and
https://www.etsy.com/listing/950334432/digital-files-myers-wood-shop-enclosure​
​
Picture
Sketchup Enclosure Model

1 Comment

Helpful Infographic for 3d Printing

1/19/2021

2 Comments

 
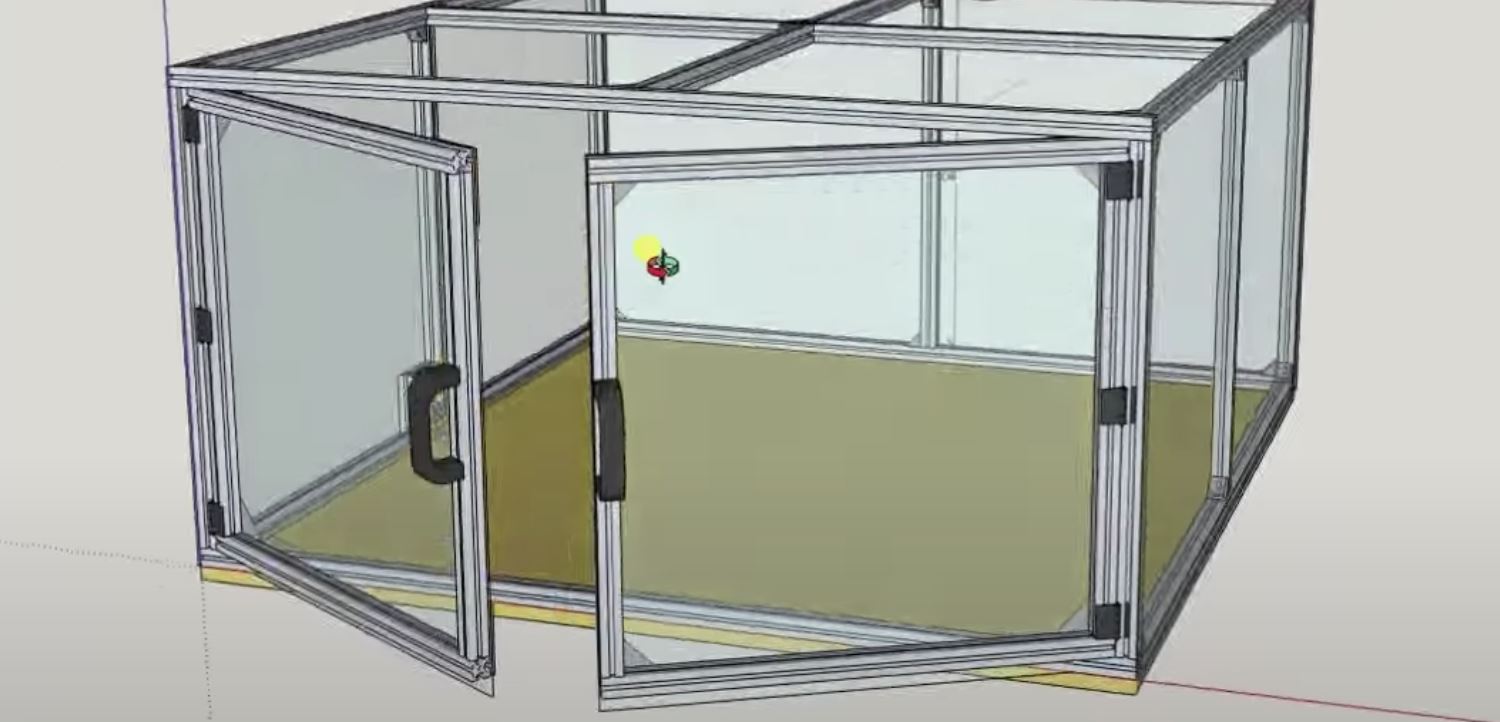
A helpful infographic for 3d printing by Billie Ruben.
Picture
Picture
Picture
2 Comments

Uses for CA Glue In The Shop.

1/8/2021

0 Comments

 
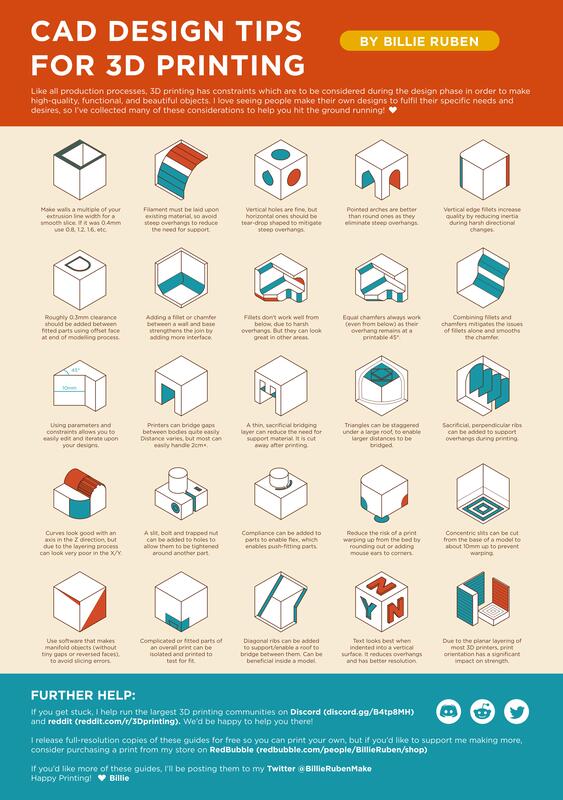
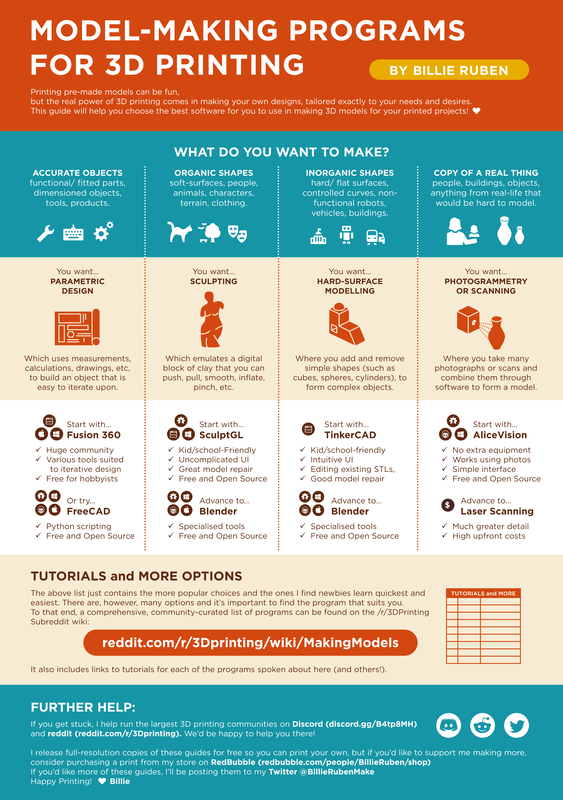
I use a CA glue a lot in my woodshop.  It has many applications with so much of my things I use.  It's perfect for use on 3d printed parts.  When doing a model, sometimes I make models and split them in half to save from printing.  Ca glue is perfect for this application as it only takes several seconds to fully dry.  Even faster with the accelerant!  It's also perfect for laser projects.  One of the things you'll inevitably make is a name sign or door hanger.  This usually requires cutting a shape like a circle as the backer, then cutting some cursive letters.  Starbond is the glue I use to adhere the letters to the backer.  It has no problem gluing to painted surfaces.
The last, and probobly most used case for CA glue in my shop is on my CNC machine.  It's something called the 'blue tape method'.  Basically, the idea is to put on piece of painters tape on the underside of the material you're going to cut, and another onto the wasteboard.   Then, put some ca glue between the two pieces of tape, a ca glue sandwich if you will, to create a perfectly heled piece that will will stay put during carving and be easily removable when it's finished.  It also means there's not clamps or bolts that can be in the way of the endmill.
Picture
Picture
My CA glue of choice is Starbond.  It's been the best and most used glue in my workshop.  It's perfect for cnc, laser, 3d prints and wood!
​
Picture

Use Code 'myerswoodshop' at checkout to
​
​save 10% amount on your purchase

Picture
​The Difference Between Cyanoacrylate and Super Glue
Adhesives play a crucial role in the life of human beings. There are many types of suitable adhesives depending on various application needs. Generally, adhesives will be weak, mild or strong relative to the composition of the surface and the stress that the surface or joint might experience. For example, cyanoacrylate glues, also called CA glues or superglues, are extremely strong when used for stabilizing and reinforcing purposes and bonding rigid material. However, due to their brittle nature, they're weak-to-mild in strength when used to bond wood or joints. Superglues should not be applied to critical joints that are expected to experience significant shear stress. In such case, epoxies or polyurethane adhesives are more suitable.

cyanoacrylate super glues

Difference Between Super Glue and Cyanoacrylate
Super glue, cyanoacrylate, and CA glue are all different names that describe the same adhesive — Cyanoacrylate. Despite the fact that CA glue and cyanoacrylate glue are all names for cyanoacrylate adhesive, various user groups adopt different names for them. For instance, woodworkers, model-builders, serious hobbyists and skilled crafting professionals utilize terms like instant glue or CA glue.

Industrial users are accustomed to calling the glue by the technical name i.e. cyanoacrylate. On the other hand, users who purchase CA glue from drug stores or home improvement stores for occasional use at home call it super glue.

There are significant differences in adhesive performance among the various cyanoacrylate products. However, they all refer to the same kind of adhesive.

Super glues bond through reaction with moisture both on the material surfaces they are bonding to and moisture present in the air.

Benefits
Cyanoacrylate adhesives are associated with a number of benefits, these include:

Fast bonding – Super glues bond extremely fast compared to other types of glue. The speed of bonding is usually measured in seconds and this depends on the working materials and the environment. The bond tends to be faster in environments that are warmer and have higher humidity.

Bond strength - Cyanoacrylate adhesives form very strong rigid bonds. This varies slightly depending on environment, materials and grade but is still high.

Material compatibility – Super glues are quite versatile thus will work with several materials. This means that they easily bond with glass, ceramics, wood and common metals as well certain kinds of plastics and rubber.

Economy – CA glues are cost effective to use. This is because a single drop can cover an area of up to 25mm². This is why it is not advisable to use too much as it can decrease final bond strength.

Mixing – Super glues are never mixed with anything during the manufacturing process, this is beneficial because of not having to achieve precise combinations.

Tips
The following are some insightful tips on how to use CA glue:

Surface preparation – It is important to always work with rough surfaces because it significantly increases the available surface area — hence, increasing its surface energy. This allows the adhesive to easily bond with the material. In addition, the surface should be dry and very clean. Contaminants such as oil and dirt may affect the drying time and bonding strength of the glue.

Gloves – It is good practice to wear gloves when working with super glues because they bond to almost anything and the human skin is no exception.

Masking – When working with complex bonding surfaces, it is better to mask all the surfaces that surround the bonding area prior to applying the super glue. The use of masking tape minimizes the risk of problems occurring during application.

Bottle shape – It is important to work with the ideal bottle shape for super glues particularly if you are dealing with objects that require a precise fit. As a rule of thumb, small squeeze tubes apply in all cases.

Storage – If you want to properly store cyanoacrylate so that it lasts for a long time, try to clean up excess adhesive that is present at the opening. It is also good to squeeze out any excess air and to tightly close the lid. The main reason for ensuring that the lid is tight is to prevent contact between air and superglue that might result in an adhesive reaction.

Clean up – Cured super glue can be extracted from a surface using one of two means i.e. chemical removal or mechanical removal. Mechanical means is generally grinding it or scraping it off with a tool. On the other hand, chemical removal involves solvents that dissolve it via a chemical reaction to leave the surface completely clean.

Uses
Super glues are used in almost all industries including woodworking, woodturning, carpentry, RC car model building, FPV plane building and racing, archery, high pressure seal repair, electronics, and more.

Conclusion
It’s important to choose the right glue for the application. For infiltrating, stabilizing, and high gloss finishes, a thin viscosity CA will be ideal. Medium viscosity CA glues are ideal for general purpose repairs, fill cracks, and bonding close-fitting parts. And lastly, the thicker viscosity CAs are designed for bonding applications where users require longer drying times to carefully position mating parts for proper fit. Browse the CA glues in the link below to choose the ideal glue for your project.
0 Comments

How To Laser A Custom Door Mat

12/30/2020

6 Comments

 
Picture
​Ever wanted a fancy custom door mat on your own front door or for a gift?! We'll, it's easy with a co2 laser! Just a few minutes of programming and one mat and you have a priceless gift that you cannot buy!  It's easy, unique and fast to make!  Also, I've placed free, helpful files at the end of this post to get you started!
Picture
The first thing you'll need is a bank mat.  I've used a couple different ones but this PLUS Haven Pure Coco Coir Doormat seems to be the one everyone likes and it gives the best results!  They run about $19 on amazon and the ship in a nice compact box you can use to ship right back to the customer!  Click the read more for the rest of this tutorial and free files!
BUY PLUS Haven Pure Coco Coir Doormat

Read More
6 Comments

How to create a Topographical Map On a CNC

12/13/2020

3 Comments

 
Picture
Ever wanted to make a topographical map out of wood?  I made one, and I created a video that walks you through exactly how to do it step by step.  The first step is to pick a place you want to make a map of.  Obviously, some places are better than others.  If you're doing Arkansas, where I live, your map is going to be pretty flat.  If you choose somewhere with huge mountains like we did of Ketchikan, Alaska, you'll get some dramatic height differences!  Once you choose a good spot, you'll need to make an .stl file of the map.  What's great is that Rowdy Roman created a video on just how to do it.  Once created, you can make it on a cnc or even 3d printer!  Take a look at that video below.  Then, we'll take that .stl and move on to Vectric Aspire in my video.


Now that we have our .stl, we move on to open Vectric Aspire.  We can use other CAD programs to do this if they have the ability to use .stls or 3d models, but I use and know Vectric, so that's what I'll be showing in my video.
Just import the .stl in the model tab, change it to the size of your material.  Make sure to drop the slider to include the very bottom of the model, and change over to the 3d roughing toolpath.  I used a bigger flat endmill to hog out most of the material.  Then I change to a finishing toolpath with a very fine tip to capture all the detail.  I go into really deep detail in the video linked below of the whole process.
Once done, we mixed some resin epoxy with some blue pigment to fill in the depths where the water would be on the map.  This gives it an amazing 3d effect and really pops in contrast from the land mass.  We gave it a light coat of poly, did a simple stained frame and it was done!  It's a lot easier than you may think!
If you want to see examples of the .stl and the Vectric Aspire files, I've linked them below:
Ketchikan .stl
Ketchikan Aspire File
If you make one, drop a comment with links to it so we can check it out!
​Happy creating!


3 Comments

Episode 20 - Failure Is Ok

12/6/2020

0 Comments

 
Picture
Picture

​We're back after a few months hiatus!  Coty, Brian, and Ben sit down and catch up on what's been going on since the last episode and you won't believe the change Coty's had.
Brians Etsy shop: https://www.etsy.com/shop/FierySquirrelArt
Get a fiery squirrel art t-shirt! : https://teespring.com/stores/fierysquirrelart
Coty's new realty Instagram @sellingarkansas
www.homesforheroes.com/affiliate/coty-skinner

0 Comments

30w Fiber Laser Omtech Settings And EzCad 2.14.11 Download

11/19/2020

2 Comments

 
Picture
Want to buy the fiber laser I use?  Go here: https://omtechlaser.com/?sca_ref=2167960.0NUx7jOeeC​
and use code "MYERSWOODSHOP" for 5% off your purchase at OMTechlaser.com
So I just purchased a fiber laser from Omtech and it came with settings that are important.  I figured I'd make a post here with pictures of all the settings incase I (or you if you have the same one) ever need to refrence them again.  These are from the factory for use in EZCad 2.  Here they are:

I'm also going to upload the very newest and latest version of ezcad 2.14.11 for download (right click, save as (you'll need 7zip to unzip the file).  I am finding that ez cad runs better when you choose compatibility mode for windows xp service pack 3 on windows 10.
EZ CAD 2.14.11 Download
Finally, a great resource for settings for fiber lasers is fiberlasersettings.org.  They have most of the settings predetermined for you and will give a great starting point for material engraving.
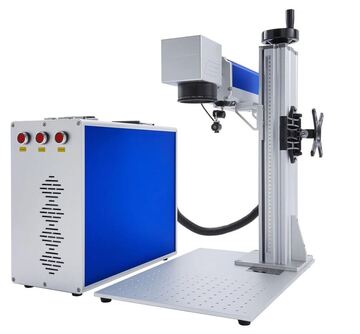
I'll be doing videos and tutorials as I learn so stop by my YouTube and this blog often to see more fiber laser content!  I'll be updating this post with more info in the future.

2 Comments

Onefinity vs. Shapeoko CNC [2022]: Which One Should You Buy?

11/8/2020

50 Comments

 
Picture

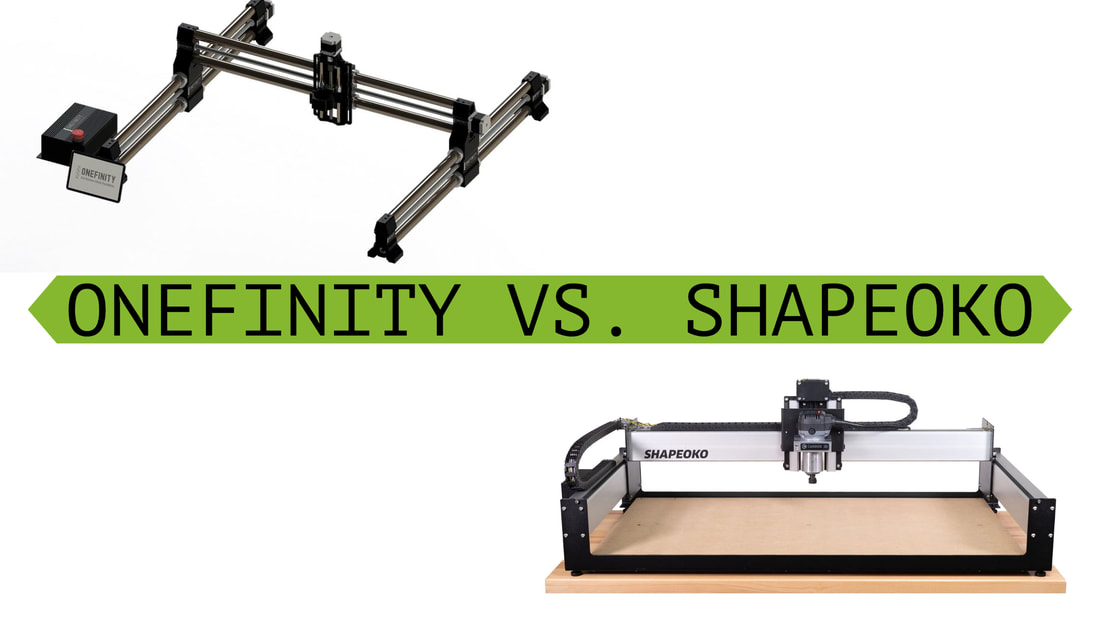
Upfront Disclosure.  Onefinity AND Shapeoko sent me their machines, FOR FREE.  Shapeoko asked that I show of their machine when I used it, Onefinity asked that I beta test the machine and help improve the machine and push it's limits for them.

*Check the end of this article for views on the pro/4/HDM*
​If you’re looking at CNC – computer numerical control machine – you’ve probably come across the Onefinity and the Shapeoko CNC machines.
If you've been following me on social medias, you've seen me use both machines.  Both CNC machines work in a very similar way, but will create 2, 2.5, and 3D cutouts of the same materials.  They are both designed to be affordable desktop models to be used by hobbyists, home business, and small business alike. They're also priced around $2,000 us making them a solid choice as a first CNC machine.
The question is – which one should you buy? I get asked this daily, so I figured I'd write up a post about the differences between the two and which one I've decided to keep in my personal shop.  Click the "read more" below to read the full article.

Read More
50 Comments

OMTech (Orion Motors) 60w Lightburn Laser Library

10/17/2020

8 Comments

 
Picture
Picture
Want to buy the fiber laser I use?  Go here: omtechlaser.com/?ref=myerswoodshop
and use code "MYERSWOODSHOP" at OMTechlaser.com

​Do you have a OMTech (formally Orion Motors) laser and are using Lightburn with it?  This is a premade library of cutting speeds and power for various woods, plastics, and other materials.  These are my personal settings I use on my 60w machine.
Just open Lightburn and click on the libraries tab at the bottom right.  Click on import and select the file below that you just downloaded.  Now you'll no longer have to guess at what settings you'll need to use on your material!


Download Here!

8 Comments
<<Previous
Forward>>
    Picture

    Categories

    All
    3D Printing
    CNC
    Deals
    Featured Makers
    Fiber Laser
    Laser
    Onefinity
    Patreon
    Podcast
    Shipping
    Shop Tour
    The Build Guild Podcast
    Tools
    T-Shirts
    Tundra
    VR
    Woodworking Projects

    “As an Amazon Associate I earn from qualifying purchases.”

    RSS Feed


    Archives

    November 2023
    June 2023
    November 2022
    August 2022
    January 2022
    November 2021
    October 2021
    March 2021
    February 2021
    January 2021
    December 2020
    November 2020
    October 2020
    September 2020
    July 2020
    June 2020
    May 2020
    April 2020
    March 2020
    February 2020
    January 2020
    November 2019
    October 2019
    September 2019
    August 2019
    July 2019
    June 2019
    May 2019
    April 2019
    March 2019
    February 2019
    January 2019
    December 2018
    October 2018
    September 2018
    August 2018


Find Myers Woodshop On Social Media:
Myers Woodshop         Searcy, AR, USA
Copyright © 2021